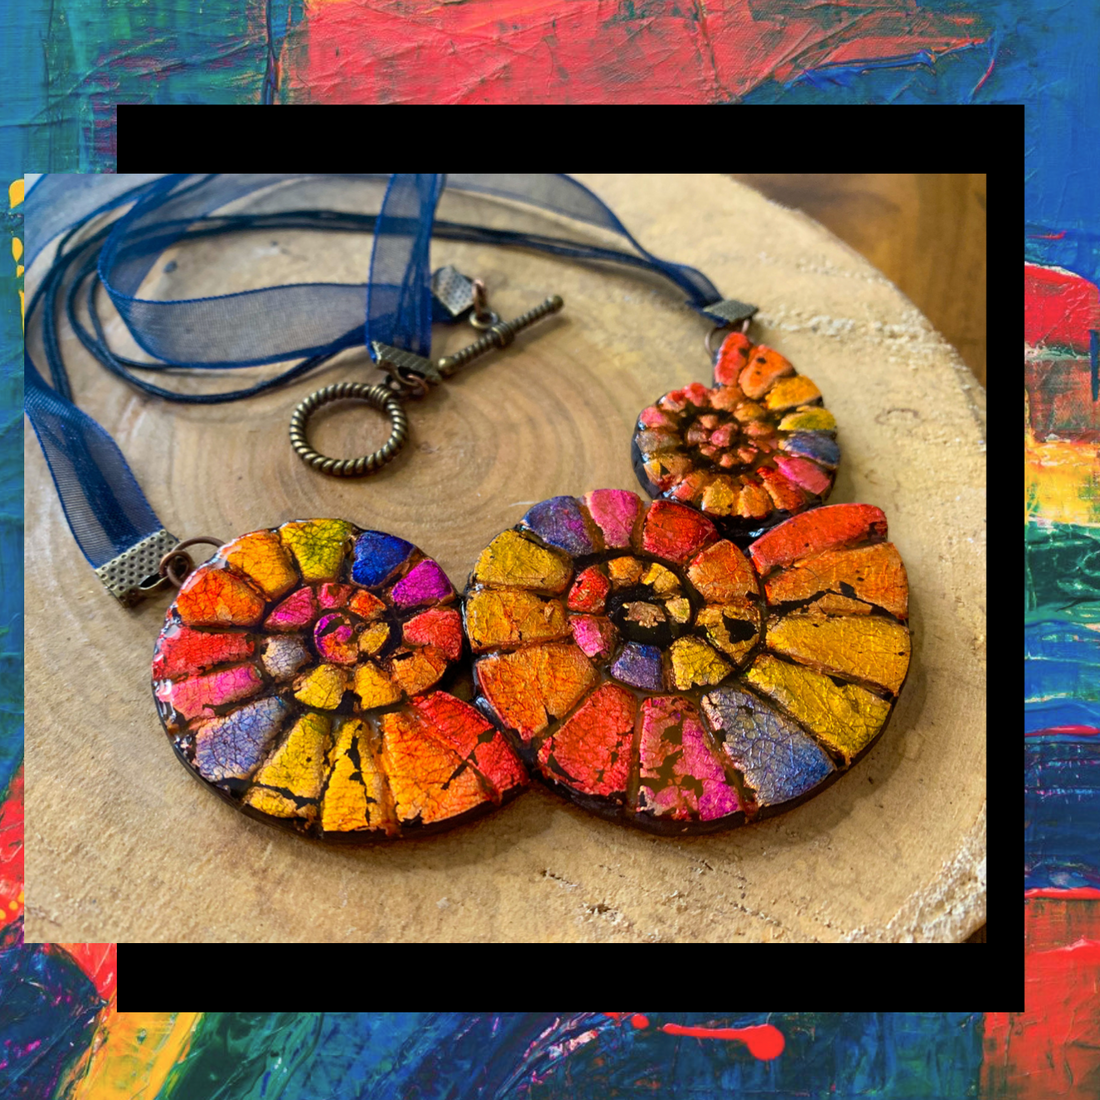
Make this Gorgeous Faux Dichroic Glass Polymer Clay Pendant

Create Along with former Design Team Member Jo Roberts and make this stunning faux dichroic necklace featuring polymer clay, copper metal leafing, and alcohol ink techniques .
Jo uses our Swirl Shell Silicone Mold to make this necklace.
Like this project? PIN IT and share it with others!
Materials:
Black polymer clay - very well conditioned
Swirl Shell Canvas Silicone Mold from CreateAlong.com Acrylic roller and Clay machine
Tissue blade and Craft blade
Thin needle tool
Copper Metal Leaf and a very soft bristle paint brush Alcohol inks in colors of choice
Kato liquid clay and brush
Heat tool
Texture tool
10mm jump rings and 10 mm circle cutter
Polypaste
Covered baking pan, tile, copy paper, & oven
Optional: UV resin and supplies
Jewelry tools and supplies of choice to string pendant
- Condition the black clay very well then roll it into a long tapered snake
- Starting at the inner most curl, begin pressing the snake of clay into one of the shell shapes of the mold - be sure the clay is fully compacted into all the parts of the mold
- Compress the clay further using the acrylic roller
- Carefully shave the excess from the top of the mold
- Repeat for all three shell sizes
- Remove the clay shells from the silicone mold
- Using a thin needle tool, create indented striations into the clay following the curvature of the shells
- Cover the shell with copper metal leaf
- GENTLY burnish the metal leaf to the clay with a soft bristle paint brush
- After all this manipulation, the shell may come somewhat uncurled - use a very small amount of liquid clay along the inner edge and then recoil the shell
- Place the shells on a protective surface and optionally donn a pair of latex gloves Choose coordinating alcohol inks - I chose a rainbow palette
- Drop very small amounts of ink onto the shell - DO NOT touch the metal leaf as it will lift
- Continue to drop the ink in a pattern to your liking - when the first layer dries, apply a second - more layers can be applied but be aware that at some point the colors will begin to mix and you may lose your pattern
- Let the ink completely dry - JUST WALK AWAY, RESIST THE URGE TO TOUCH!!! Cure the shells for 1 hour at the temperature recommended for your clay

Apply a very thin layer of Kato liquid clay over the entire top surface of the shells - this will be a delicate process because you do not want the brush to touch the foil because it will still lift
Using a heat gun, cure the surface liquid clay - you will know it is cured when the surface sheen goes from a milky look, to a satin look, to a glass like appearance - this will happen fast so pay close attention
- Roll out the remaining black clay to a medium setting and apply a back on each of the shells - texture with a texture sponge
- Arrange the shells so that they create a curve - be sure the adjacent pieces have two contact points
- Place a 10mm jumpring at each of the contact points, press into the clay
- Also place a 10mm jumpring at the end points where the necklace will be attached Apply a small dab of PolyPaste over each of the jumprings
- Roll out more black clay to a thin setting and cut out several 10mm circles - use one on each side of the joining jumprings and one one the jumpring where the necklace will be attached
- Use the texture sponge to blend the circles of clay into the backing
- Trim the pendant and texture the edges
- Cure again for 45 minutes at the temperature recommended for your clay
- String the pendant using your preferred method
- Note: If you want the pendant to have a deeper shine, you can cover with UV resin.


